
Photographer Christopher Robin Wetherall
Some cosplays come together smoothly… and others fight you every step of the way.
This was definitely the second one. From sourcing pieces to building props to unexpected issues (including a literal mouse incident), this cosplay turned into a full learning experience, but also one of the most fun I’ve done.
The Concept
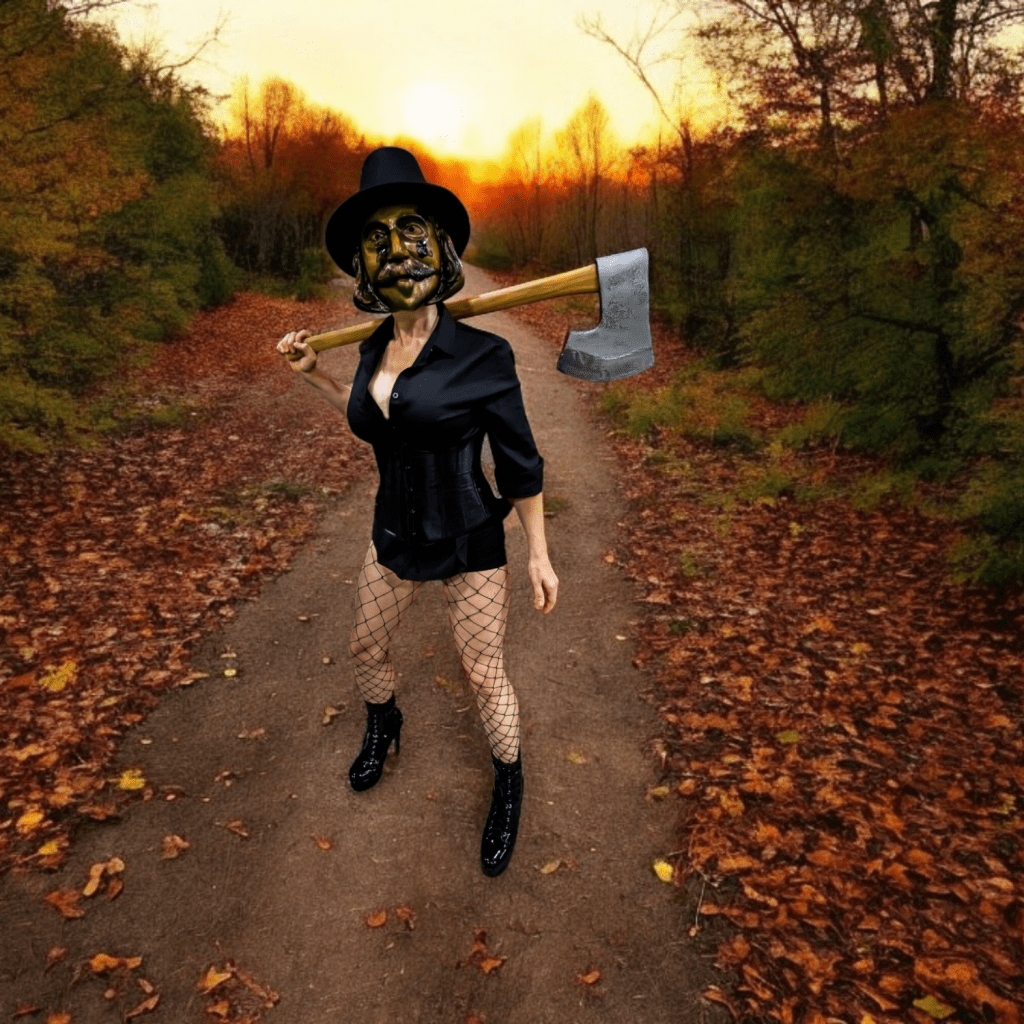
This look is based on John Carver from Thanksgiving, and I decided to put my own spin on it by creating a slightly stylized / feminine version while still keeping the recognizable elements. I wore this to Silver Scream Con in Worcester, Massachusetts, which is a horror convention and honestly, the horror community made this experience even better. They get it. Whether you go accurate, stylized, or even a little over-the-top, people are supportive and have fun with it.
Hat (Pilgrim Hat)
The hat was one of the first challenges. It’s a pilgrim-style hat, which surprisingly isn’t the easiest thing to find on demand, especially around seasonal times like November. A lot of them were:
- Backordered
- Limited in stock
But I was able to get one in time, and it worked perfectly to establish the silhouette of the character.
The Mask (A Whole Journey)
The mask situation… was a journey.
Mask #1:
Purchased from a 3D print seller. More historically accurate to what John Carver might have looked like. While I appreciated the concept, the material was:
- Extremely dense
- Very difficult to modify
I tried:
- Sanding it (took forever)
- Attempting smoothing techniques (which didn’t work with that material)
It was so tough it felt nearly indestructible but also impossible to refine. Eventually… I gave up on it and threw it away out of frustration.
Mask #2 (Final Mask):
- Pre-painted
- Came with straps already attached
This one was much more usable but still came with its own set of problems.
The Mouse Incident (Yes, Really)
Because I bought the mask ahead of time and stored it, something unexpected happened. A mouse somehow got into my apartment and took a small bite out of the mask. I still don’t know:
- Where it came from
- Or where it went
My cats didn’t find it. I didn’t find it. All I know is: It took one nibble… and disappeared.
Humidity Damage & Repairs
On top of that, the mask also reacted poorly to humidity, which caused:
- Warping
- Structural changes
- So at that point, the mask had been:
- Nibbled
- Warped
- And needed repair
Instead of trying to restore it perfectly, I leaned into it and created a “burned” version using black paint to add damage and texture.
Fit Issues & Foam Lesson
At the convention, I ran into another issue that the mask didn’t sit properly on my face. I later realized I should have added EVA foam inserts inside to:
- Improve fit
- Add comfort
- Stabilize positioning
I had the materials. I just didn’t think to use them beforehand. Because of that, I was constantly:
- Adjusting it
- Taking it on and off
- Fighting with it throughout the day
Eventually, it even fell onto the concrete floor and cracked. Luckily, I had a small container of contact cement on me (which I originally brought just in case the straps failed) … and ended up using it to repair the mask mid-convention. So, this mask has:
- Been chewed by a mouse
- Warped by humidity
- Painted over
- Dropped on concrete
- And glued back together
It’s been through a lot.
The Axe (Build Process)
The axe was another major part of this build. I started by:
- Using a template based on a store-bought axe (from Bass Pro Shop)
- Tracing it
- Returning it afterward
And yes, I made a joke at the counter like:
“Nothing wrong with it. He apologized.”
as in a boyfriend pissed me off joke.
Or did I? You’ll never know. I was John Carver. Just kidding.
Materials & Challenges
I experimented with:
- Flooring foam (mixed open-cell / closed-cell)
- Professional EVA foam
Each came with challenges:
- Flooring foam was inconsistent
Dense EVA foam was difficult to cut cleanly I used:
- Moldable foam for edges
- A sander (which… struggled)
At one point, my sander basically gave up and started vibrating uncontrollably, so I had to switch to manual sanding, which took significantly longer. This is definitely one of those moments where better tools would make a huge difference.
Paint & Accuracy
The spray paint I used worked really well:
- Metallic finish
- Durable enough for prop use
- Not mirror chrome but perfect for an axe
I also loved the detail that the axe itself is based on a historically accurate tool; a long-handled axe used for things like log cabins and railroad work. That kind of detail really tied the whole piece together. The way it was in a historical cabin in the film shows they did their research.
Outfit & Styling
The rest of the outfit was built from pieces I already owned:
- Corset: from my Lady Krampus cosplay
- Top: black long-sleeve dress shirt (Chico’s)
- Bottoms: black shorts
- Fishnets: staple piece I always have
- Boots: reused from another cosplay
This gave it a stylized, slightly “sexy horror” look, which the horror community fully embraced.
The Experience
One of the best parts of this cosplay was the reaction.
People:
- Got the reference
- Played along
- Encouraged the humor
At one point, people even told me: “No, no, text on your phone! We need that shot!”
(Referencing the character’s messaging behavior in the film.)
I also ran into:
- Another John Carver
- A kid who took a photo with me (and even wore the hat!)
It turned into a really interactive and fun experience.
Final Thoughts
This cosplay was far from perfect but that’s what made it memorable. It taught me:
- Material choice matters
- Fit and comfort are critical
- Always test things before the event
But it also reminded me: Even when things go wrong, you can still make it work and have a great time doing it.
Costume Notes & Condition
- The mask is still stored (battle-damaged, but meaningful)
- The axe has been reworked multiple times and may be refined further
- Clothing pieces remain part of my wardrobe
This is one of those builds I may revisit in the future with better tools and a lot more experience.